
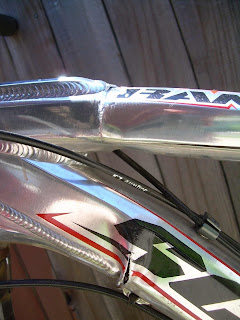
Tubeless means just that, there isn't a tube to hold the air in you tires. Similar to a car tire. Rims have to be set up specifically for tubeless, or have to use a conversion kit. Basically there can be no holes in the rim for air to escape. In a typical rim there are holes in the rim for installing spokes. My rims are solid so no holes for air to escape except for where the tube valve normally sticks out. How do you fill that hole you say? With a special valve to put air in the tire, but with a rubber plug that seals the inside of the rim and a screw and o-ring that seals the outside of the rim and tightens it to be air tight. (sorry if the photos are blurry they are from my iphone) But here is what the inside of the rim and the air valve looks like.
Now the tire. There is a difference between a tubeless tire and a non-tubeless. The tires will say that on the packaging or your local shop will know. A tubeless specific tire is a bit thicker to prevent flats and loss of air through the sidewalls, and the bead (the ridge around the inner circle of the tire) that hooks

into the rim has a better seal to also prevent air loss. So once you pick out your tires based on terrain, bike use, etc. put it on you wheel. Check to see if the tire is directional. usually if you see some sort of arrow shape in the tread. Your tire should roll in the direction of that arrow or there is sometimes a mark on the side of the tire. Try to use tire levers as little as possible with tubeless tires to prevent damaging the bead which could break the air seal there. Get one side on and start to put on the other side and leave about 8 inches unhooked and open. We are going to use this open area to pour in the tire sealant. Hang you wheel on something with that opening at the bottom.

What is this sealant? Well you don't have to use it but it helps seal the tire and rims but also prevent flats once you're riding them. I used Stan's, but there is a variety of product out there. Stan's is by far the most popular and its what we sell at REI. So you get you bottle of Stan's and shake it upside down to get all the thick goo near the lid for when you pour. ( you may make a mess like me) The amount you put in depends on tire size and how much you're concerned with weight, the info is one the bottle of sealant. But pour the recommended amount of sealant (which looks like pancake mix) into the open area you left by not fully installing the tire. Then you carefully finish installing the tire, being sure to keep the wheel perpendicular to the ground so the sealant doesn't pour out. Once again try to do this without a lever but sometimes new tires are tight so be gentle with a lever is you use one so you don't tear the bead. With the tire fully installed you'll need a air compressor next. An air compressor is needed because it puts air in so quickly it does not have a chance to escape while the tire pressure is low and the tire bead isn't sealed. Fill the tire almost full with the compressor and then fill the tire the rest of the way to the max pressure with a floor pump. Be ready for some snaps from the tire, sometimes loud ones. That noise is the tire fitting into the rim. Once it's up to pressure inspect the tire to make sure its not about to come off the rim (if it is immediately let out some air!) or if the tire isn't fully seated in the rim (this will look like the tire is too deep into the rim). Usually there is a little rubber line around the tire next to the rim just follow that line to see if its the same distance away from the rim around the whole tire on both sides. Now rotate and shake your tire to spread the sealant and Bam! your tubeless!
Now why did I do this? Yes it's installation is a little more difficult and messy, and sometimes air disappears over night (use sealant). But here are the advantages;
Eliminates pinch flats, the most common reason for flats while mountain biking. Won't stops thorns or glass though. Only a solid rubber tire would do that, which is a bit heavy :)
Ability to run lower tire pressure which means more traction, and a big plus for a more plush ride for those of us who ride hardtails. Recommend 30-38psi, which is about 10psi less than non-tubeless.
Theoretically lower rolling friction, but only computer's can feel this
Bring your old fashioned tube on rides though. If you happen to get a flat the easiest way to fix it on trail is to put in a tube then diagnose what happened when you get home. So better traction up hills and around corners, no pinch flats. Sounds good to me. Here's to good rest of the season!

.jpg)


